Kristen requested shoe cabinets. Kristen has a problem, and its shoes, too many shoes. I see no point in a collection being left in boxes as you never can see it nor enjoy it. So the solution was some shoe cabinets. Searching the internet we came across Ana White’s website that showed some nice shoe cabinets. I started with their design and modified them to fit our requirements. We chose to go with 3 cabinets, one with the same size cubicles, one with 3 different sizes of cubes and one with just shelves. After reading the book By Hand and Eye from the Lost Art Press I now know why we like the one with the three different size cubes, they are just more appealing and proportioned.
So it begins, I went with a paint grade 3/4 ply from Paxton Lumber, about 55 a sheet. Do yourself a favor and never buy your project plywood from the big box stores. Go to your local hardwood supplier and you will find flat stable cabinet grade plywood. Some big boxes are carrying some decent american ply but most do not. Last thing you want to deal with is warped stock before you start. I have had it warp on the way home from the big box. We have three great places, Boulder Lumber here in Boulder will give free delivery so I usually go with them. Austin Hardwoods in denver is a great choice as well and has a great in stock selection of prefinished and cabinet grade plywoods.
The storage area of choice, the living room! 5 sheets or so.

How do we cut this down you ask? Well with a Festool TS55 Panel Saw. With my handy parralell guides made from Instamorph and some aluminum guides we can make quick work of this sheet stock.
All the pieces cut to width, all the same size 🙂

Now to cross cut all the dividers and the shelves.

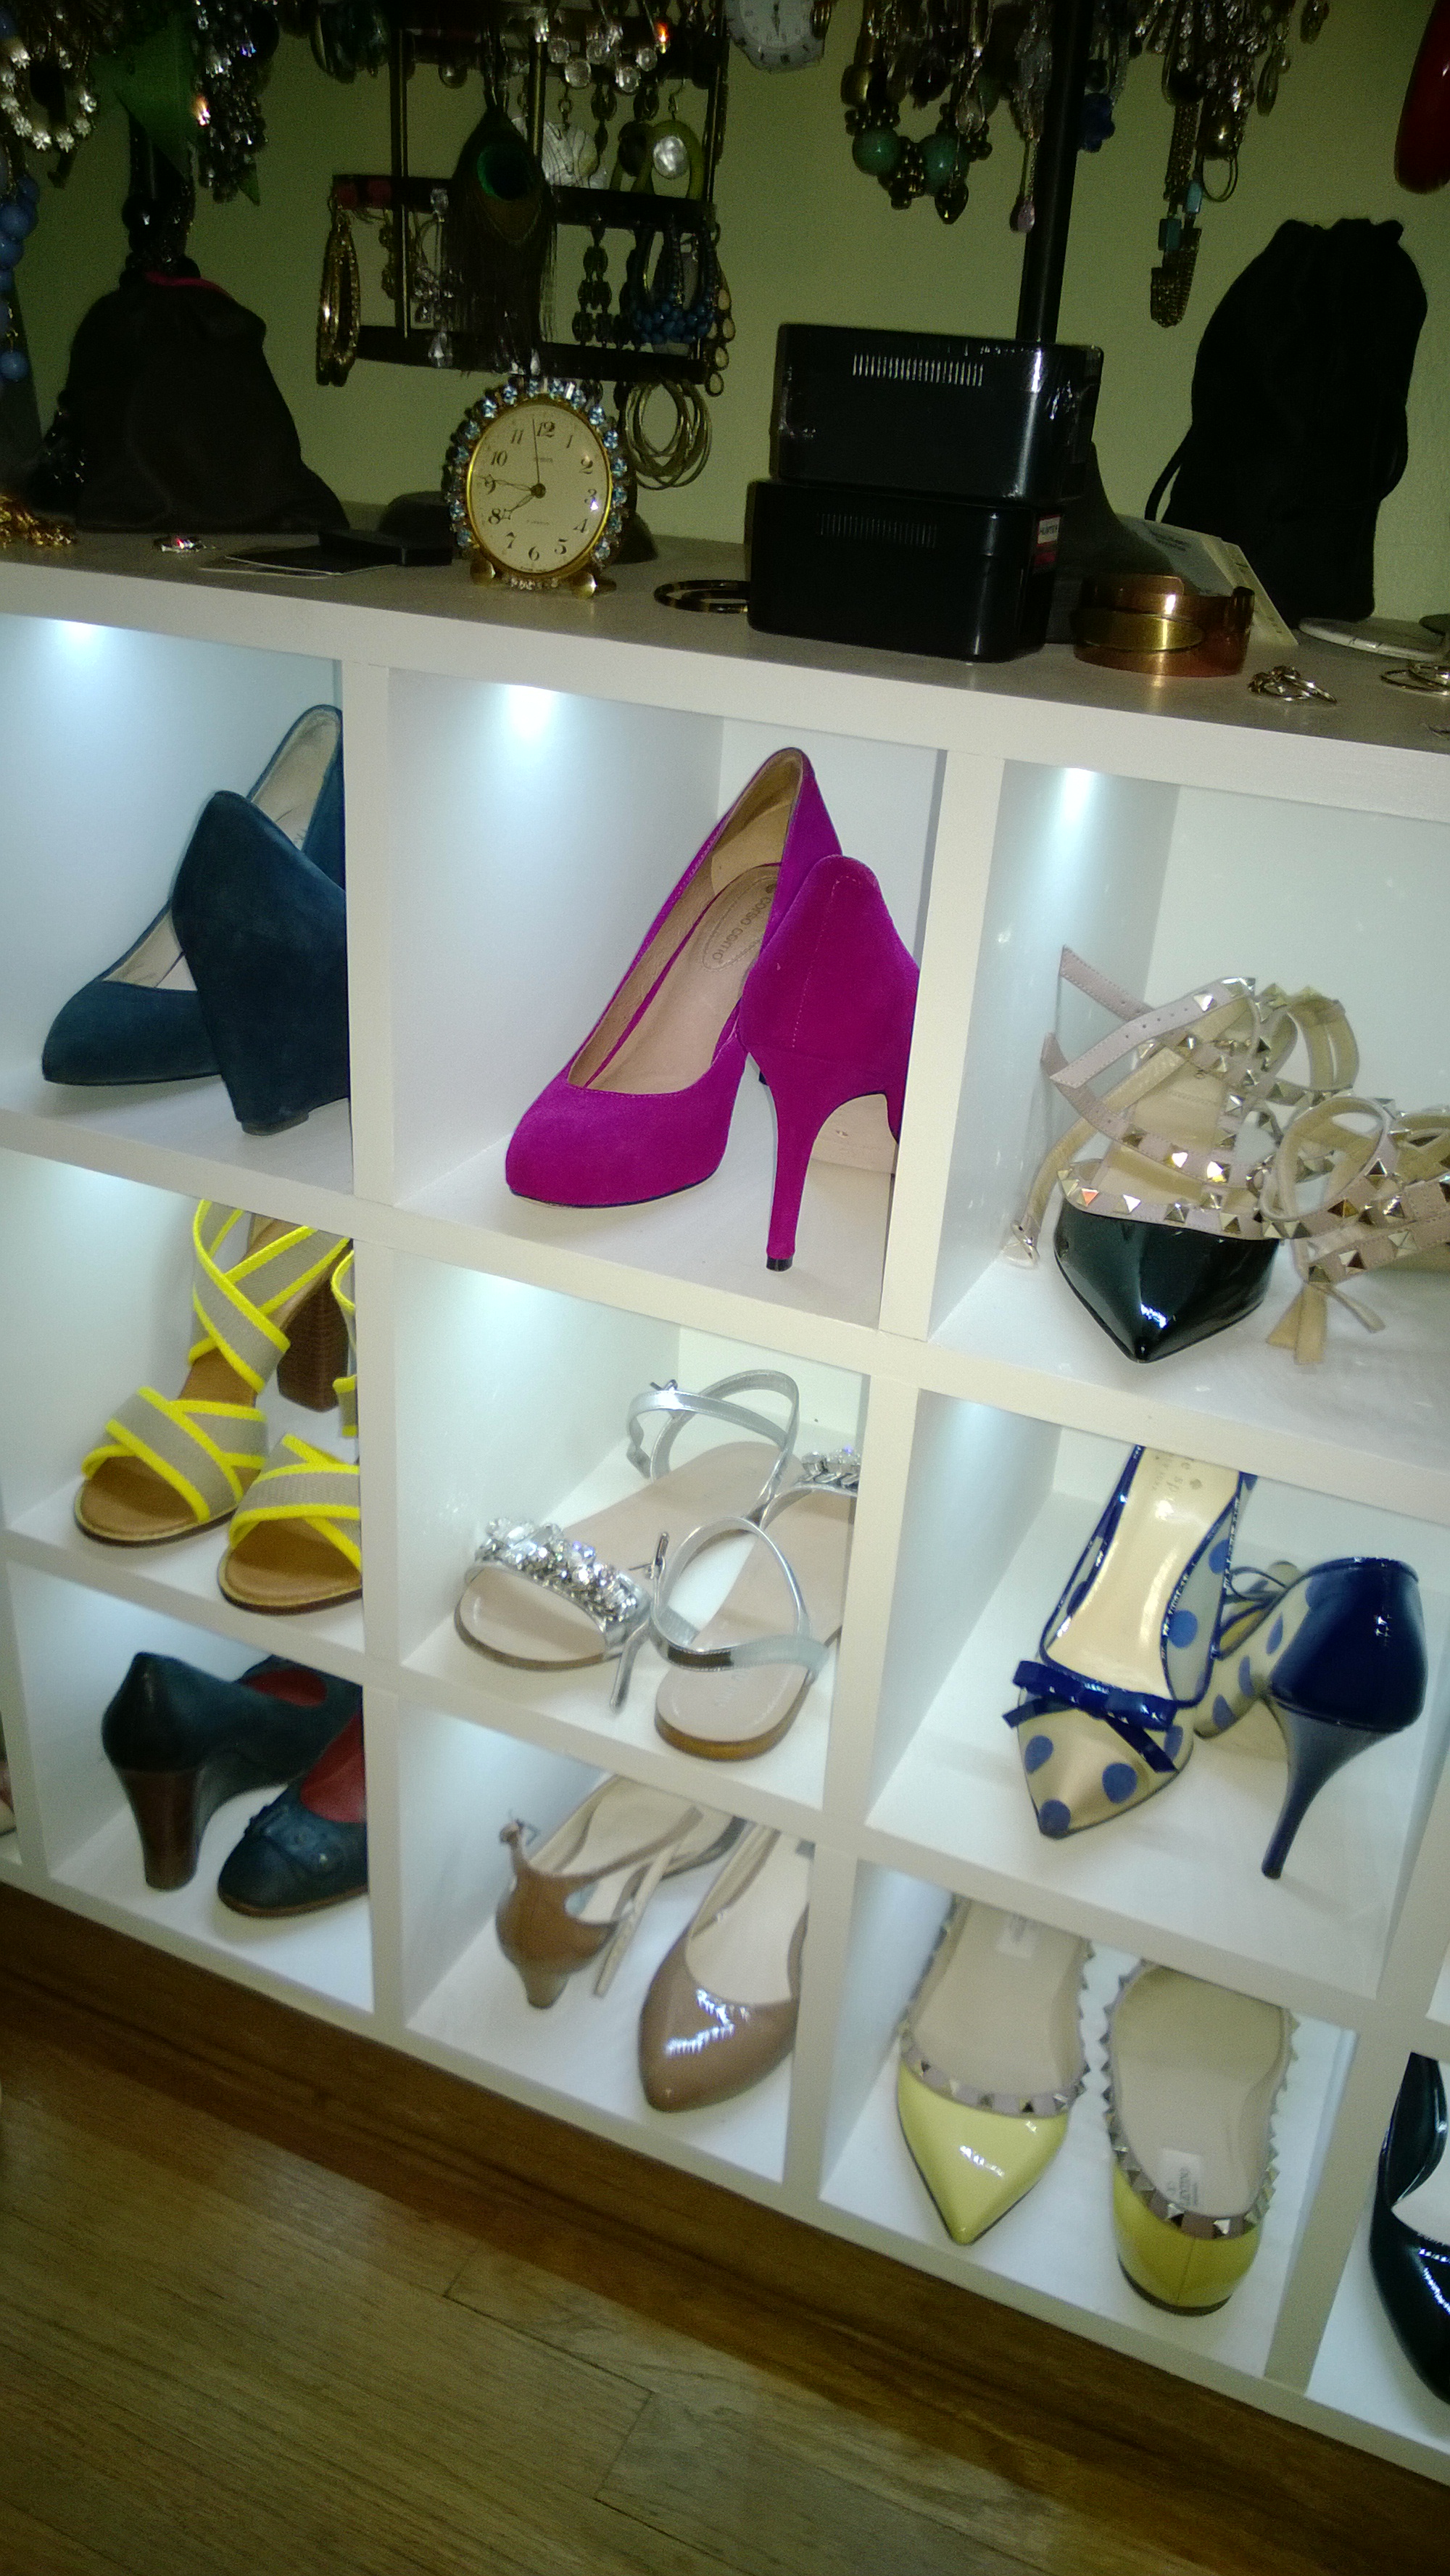
The easy one to work on is the straight shelf. We did multiple test fits with the shoes and arranged the stops, depth and angle until they worked for Kristen’s size 7. You’ll see some clamps being used. This setup was put together with glue and Kreg pocket hole screws. Quick and easy and would make a fine cabinet maker cringe :).


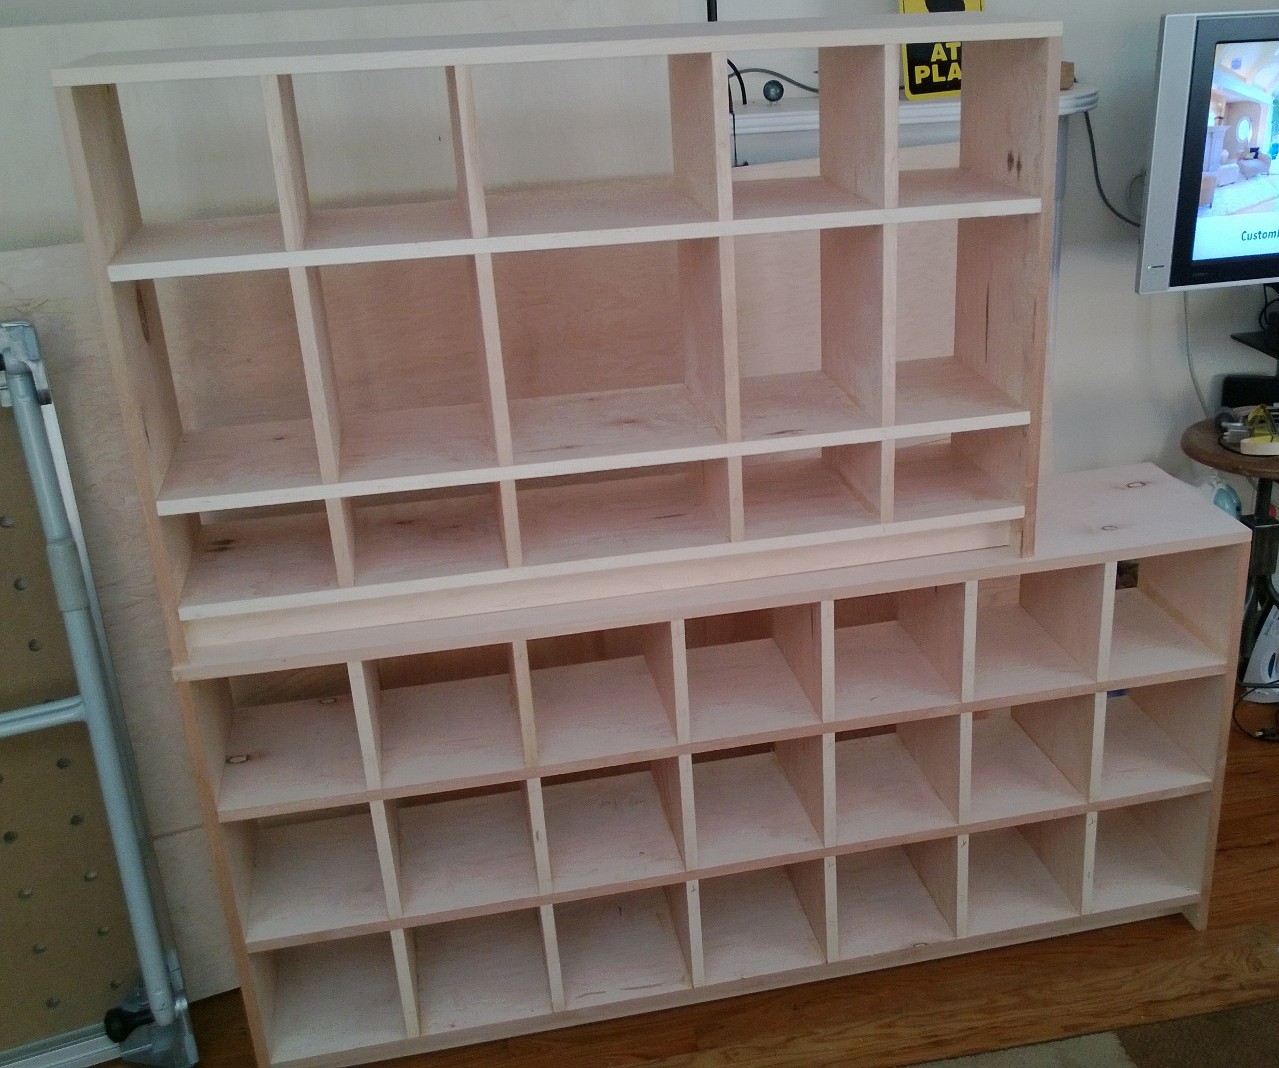
Now the cubby style cabinets were a bit more work. I didn’t take too many pictures. The middle shelves, the bottom and the toe-kick are attached to the sides with pocket hole screws and glue. The dividers were installed with biscuits and glue as I did not want to fill that many pocket holes. The top is also attached with biscuits and glue. If I made it again I would probably use dominos for assembly and scrap the screws.
Edge banding was next with an iron and some patience. I should have edge banded before assembly, oops.
Paint! Sprayed them with a sprayer. My sprayer sucked, had to really thin the paint. I used a latex eggshell. Now I would either set a spray booth up in the back yard or pay a finisher to spray them for me.

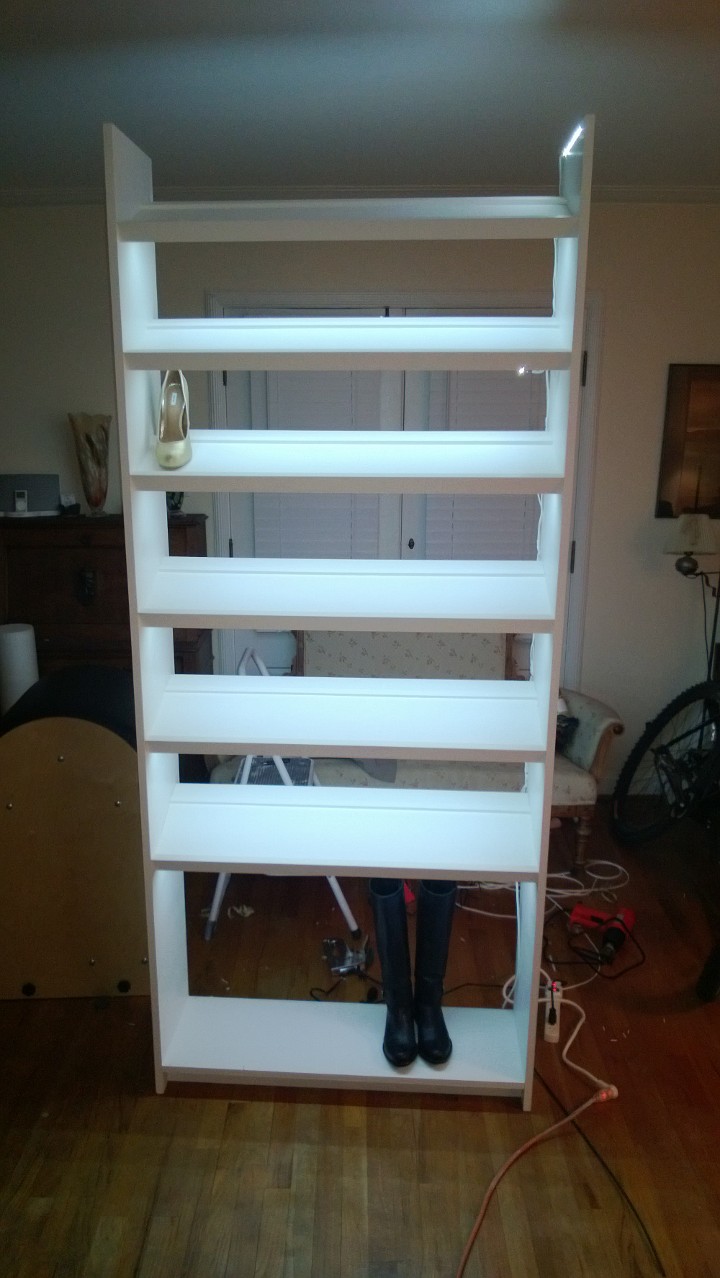
Our house is dark, lighting design is from the 1930’s. While enjoying a sauna it occured to me we could add LED lights. A quick search on amazon found some cheap lights, 10 bucks a roll and a transformer for 5 bucks, another 5 for a foot switch and some lamp cord and we were good to go. Let there be light!

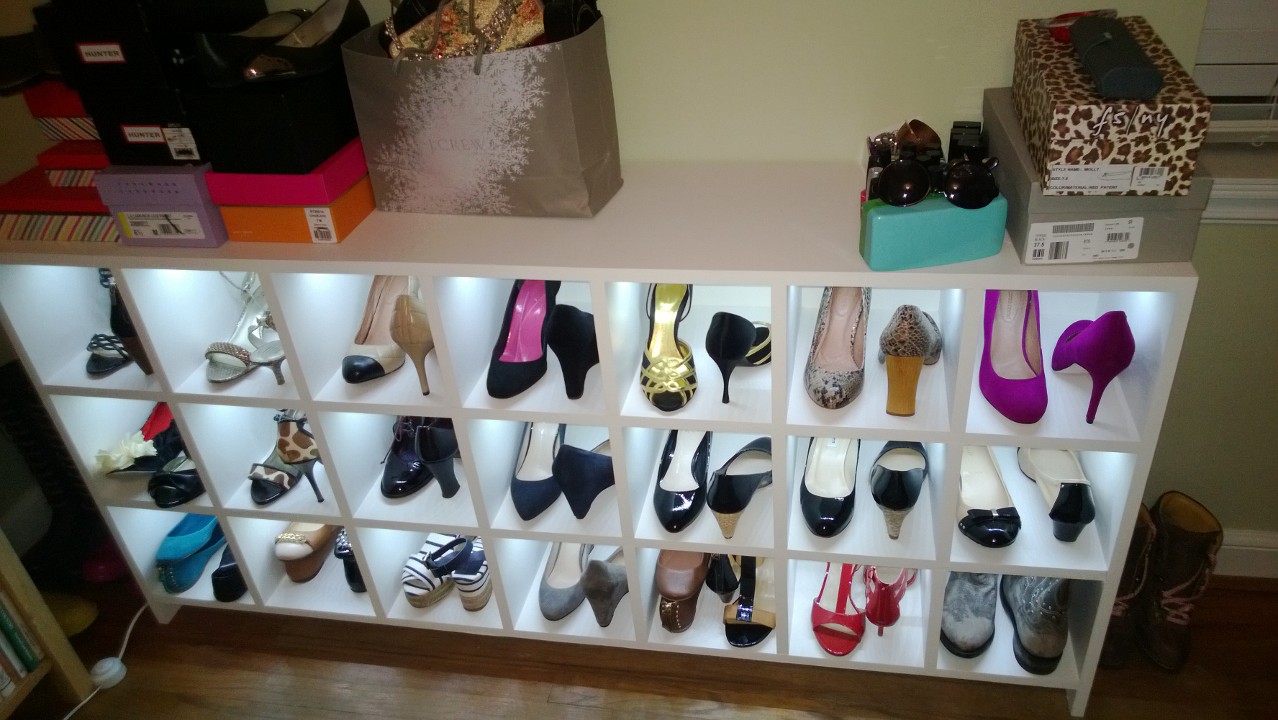
Installed and filled with shoes! Feels like a Nordstrom rack some days.


Also posted on Kristen’s blog http://www.sparklestyleshine.com/2013/03/the-ultimate-shoe-closet.html

Custom make those for a fortune!
Ahem, the lights were the genius idea of yours truly. I thank you immensely for building these as I love them.
Question is what the customer would pay. I didn’t go cheap making these. 3/4″ paint grade cabinet plywood. If I had an edge bander I’d make a go of it.