New muffler for the 1998 Honda Civic EX

It has been sometime since my last post.  Its not that I have become bored of my blog, I actually started a full time contract that is more than full time.  Actually working 60 hours a week has cut into my hobbies, thankfully it is almost over and things should return to normal in another month or so.

Meanwhile the commuter car, the “mighty civic” had a muffler problem.  What started slowly as a slightly loud exhaust eventually turned into something that sounded like a bad lawn mower without a muffler.  I could hear it over the radio in the car.  One day I look under to see the muffler complete separated from pipe coming form the cat and hanging only by the rubber mounts.

What is one to do? Buy a new one and install it yourself of take it to a shop?  I went with the former.  Amazon.com to the rescue, never thought I’d order from amazon but the parts were cheap and an exact fit.  The local places wanted to sell me multiple parts and pieces.  I didn’t want Honda dealer prices, its a muffler, how hard can it be to make.

WP_20150314_001

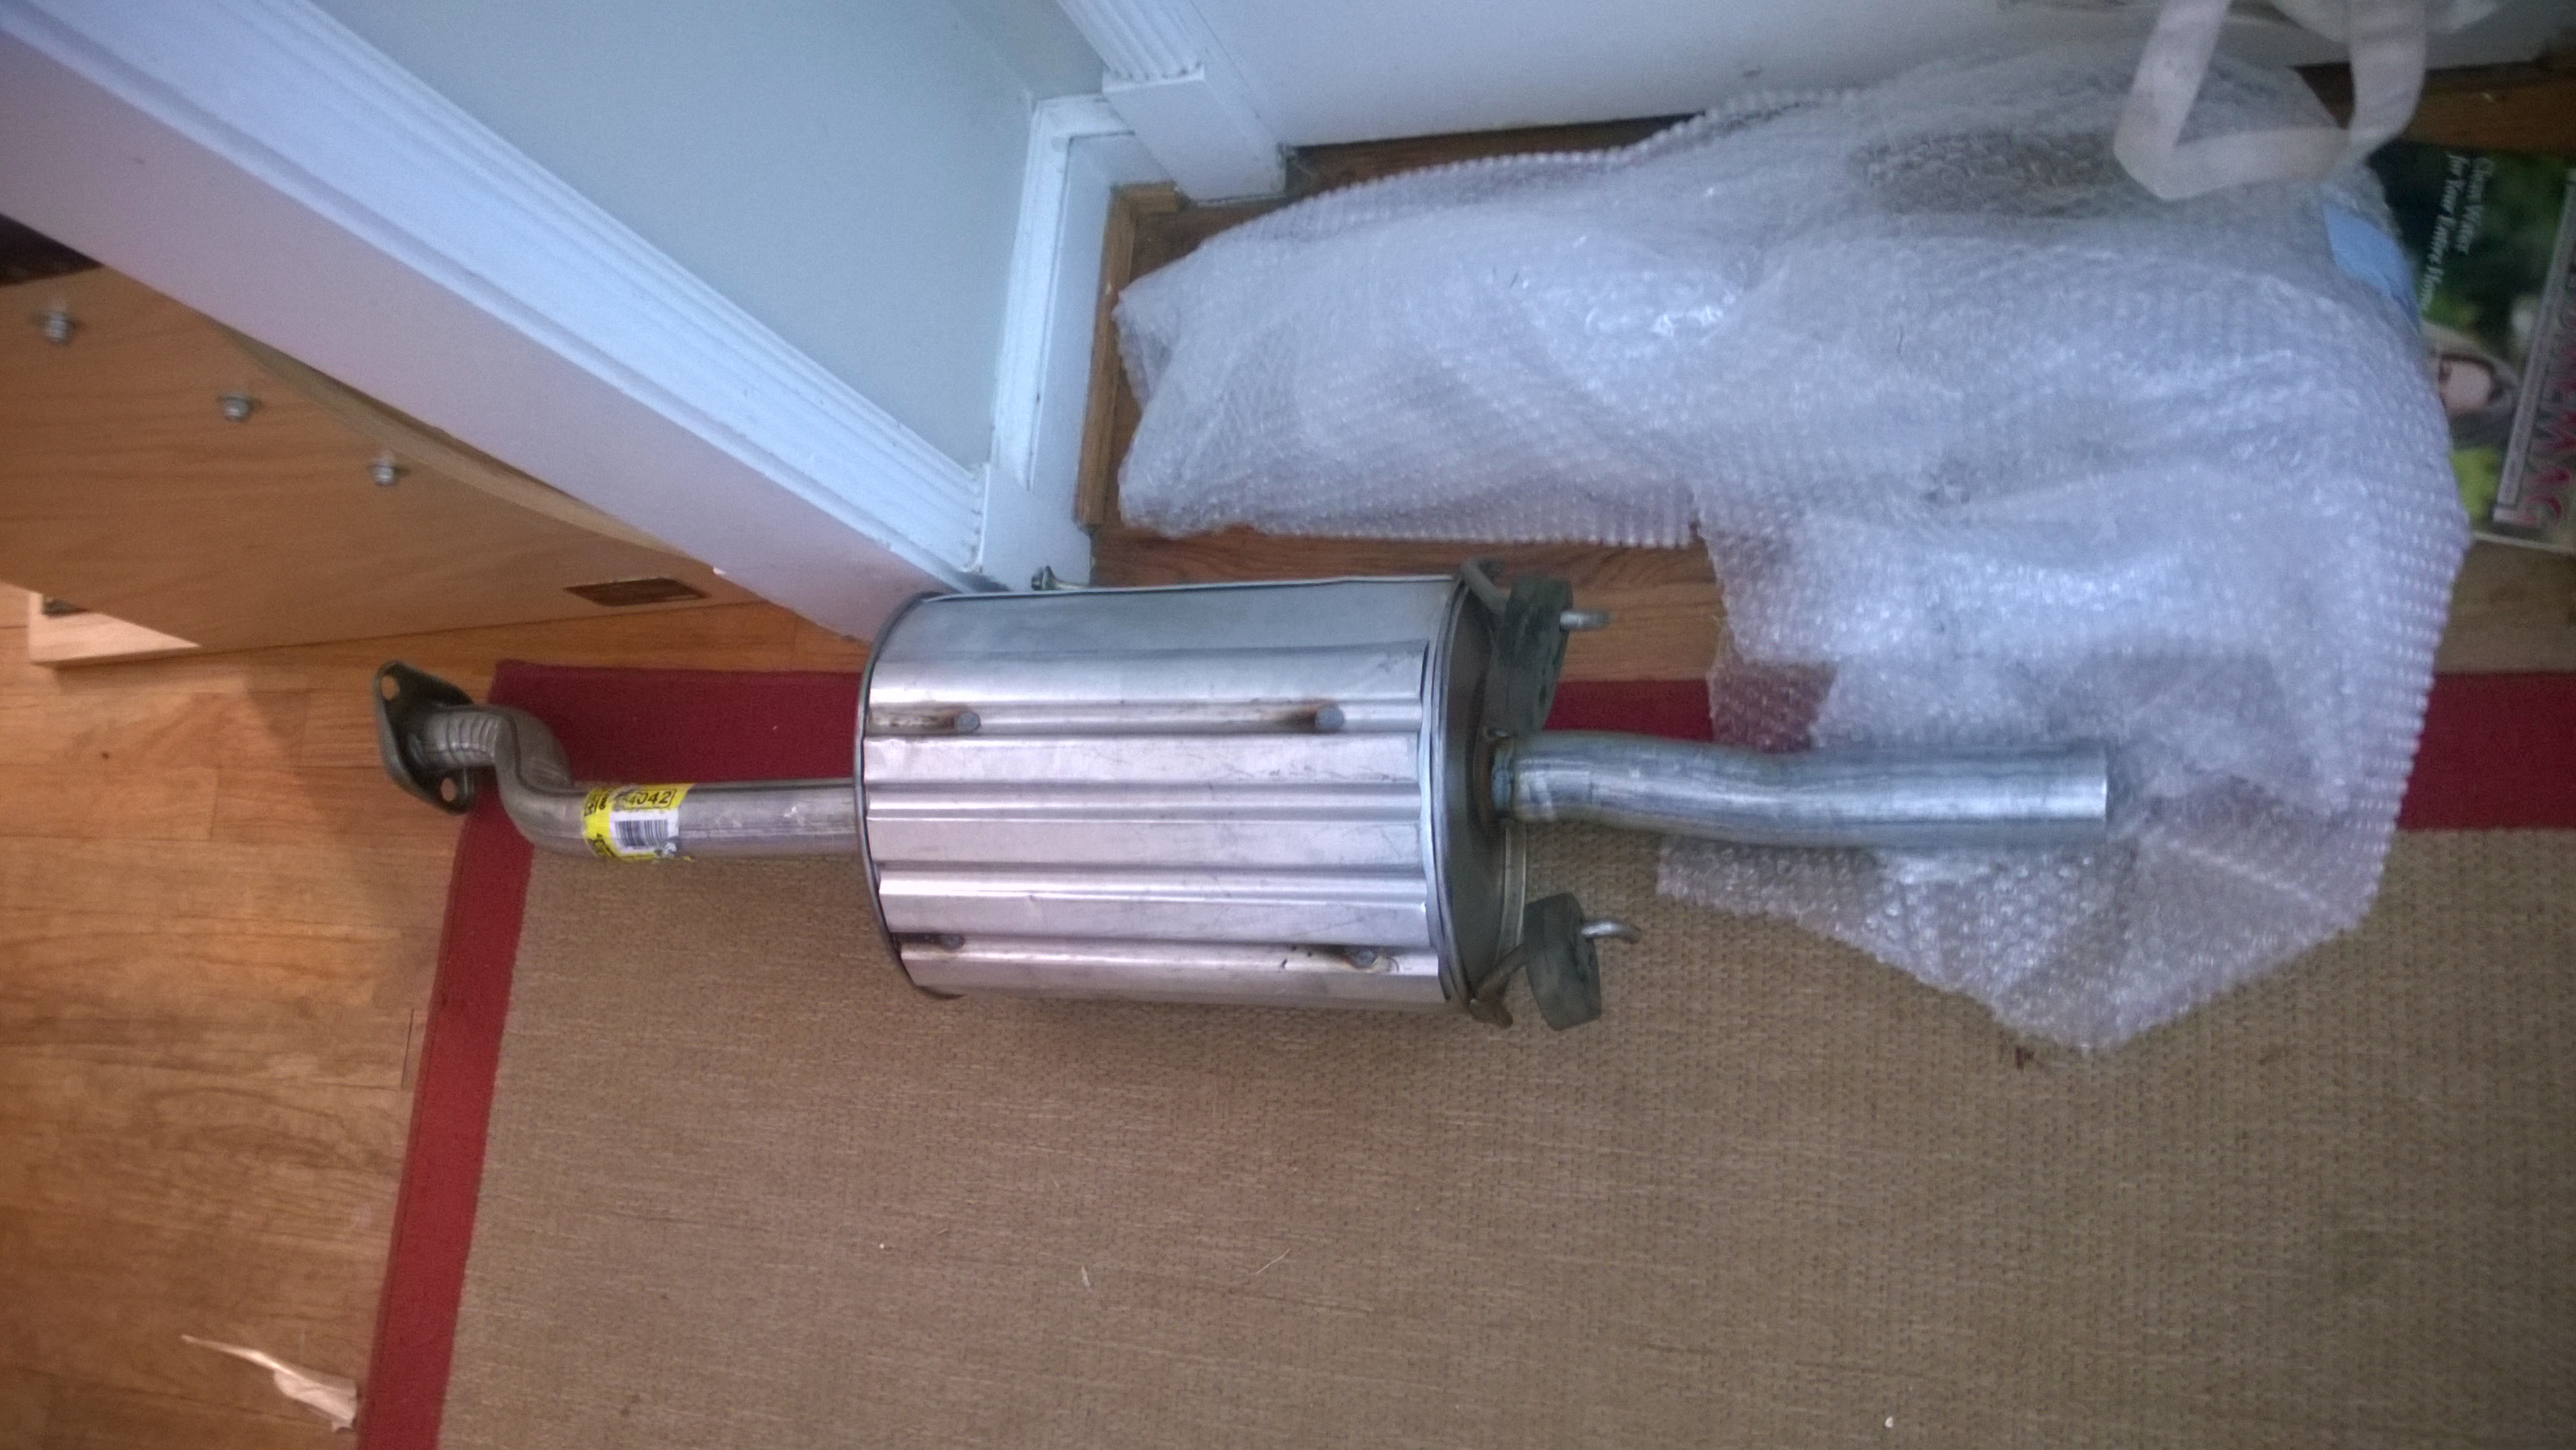
The new muffler unwrapped from the bubble wrap.  I transferred the rubber mounts over. Come complete with heat shield.

I ordered a bolt and spring set as well.  When I removed the bolts I broke them both thinking, no bid deal the nuts will fall to the ground.  Nope, that didn’t happen.  Turns out they were welded to the cat pipe.

Plan B, remove whats left of the old bolts with vise grips from the back of the cat pipe flange.  This worked after a bit of penetrating oil.

WP_20150314_006

The new versus the old.  Notice the springs are flat on the old.  This give that much needed little bit more room to install the bolts.  I used the old springs with the new bolts and all was good.

WP_20150314_020

Ready with the new crush flange thing, order this separate along with the bolts.

Install was easy once I went with the original springs.  Maybe a c clamp would have helped but I was working on the street with one wheel up on the sidewalk and the wheels chocked.

WP_20150314_023

All nicely connected.  Much quieter!!
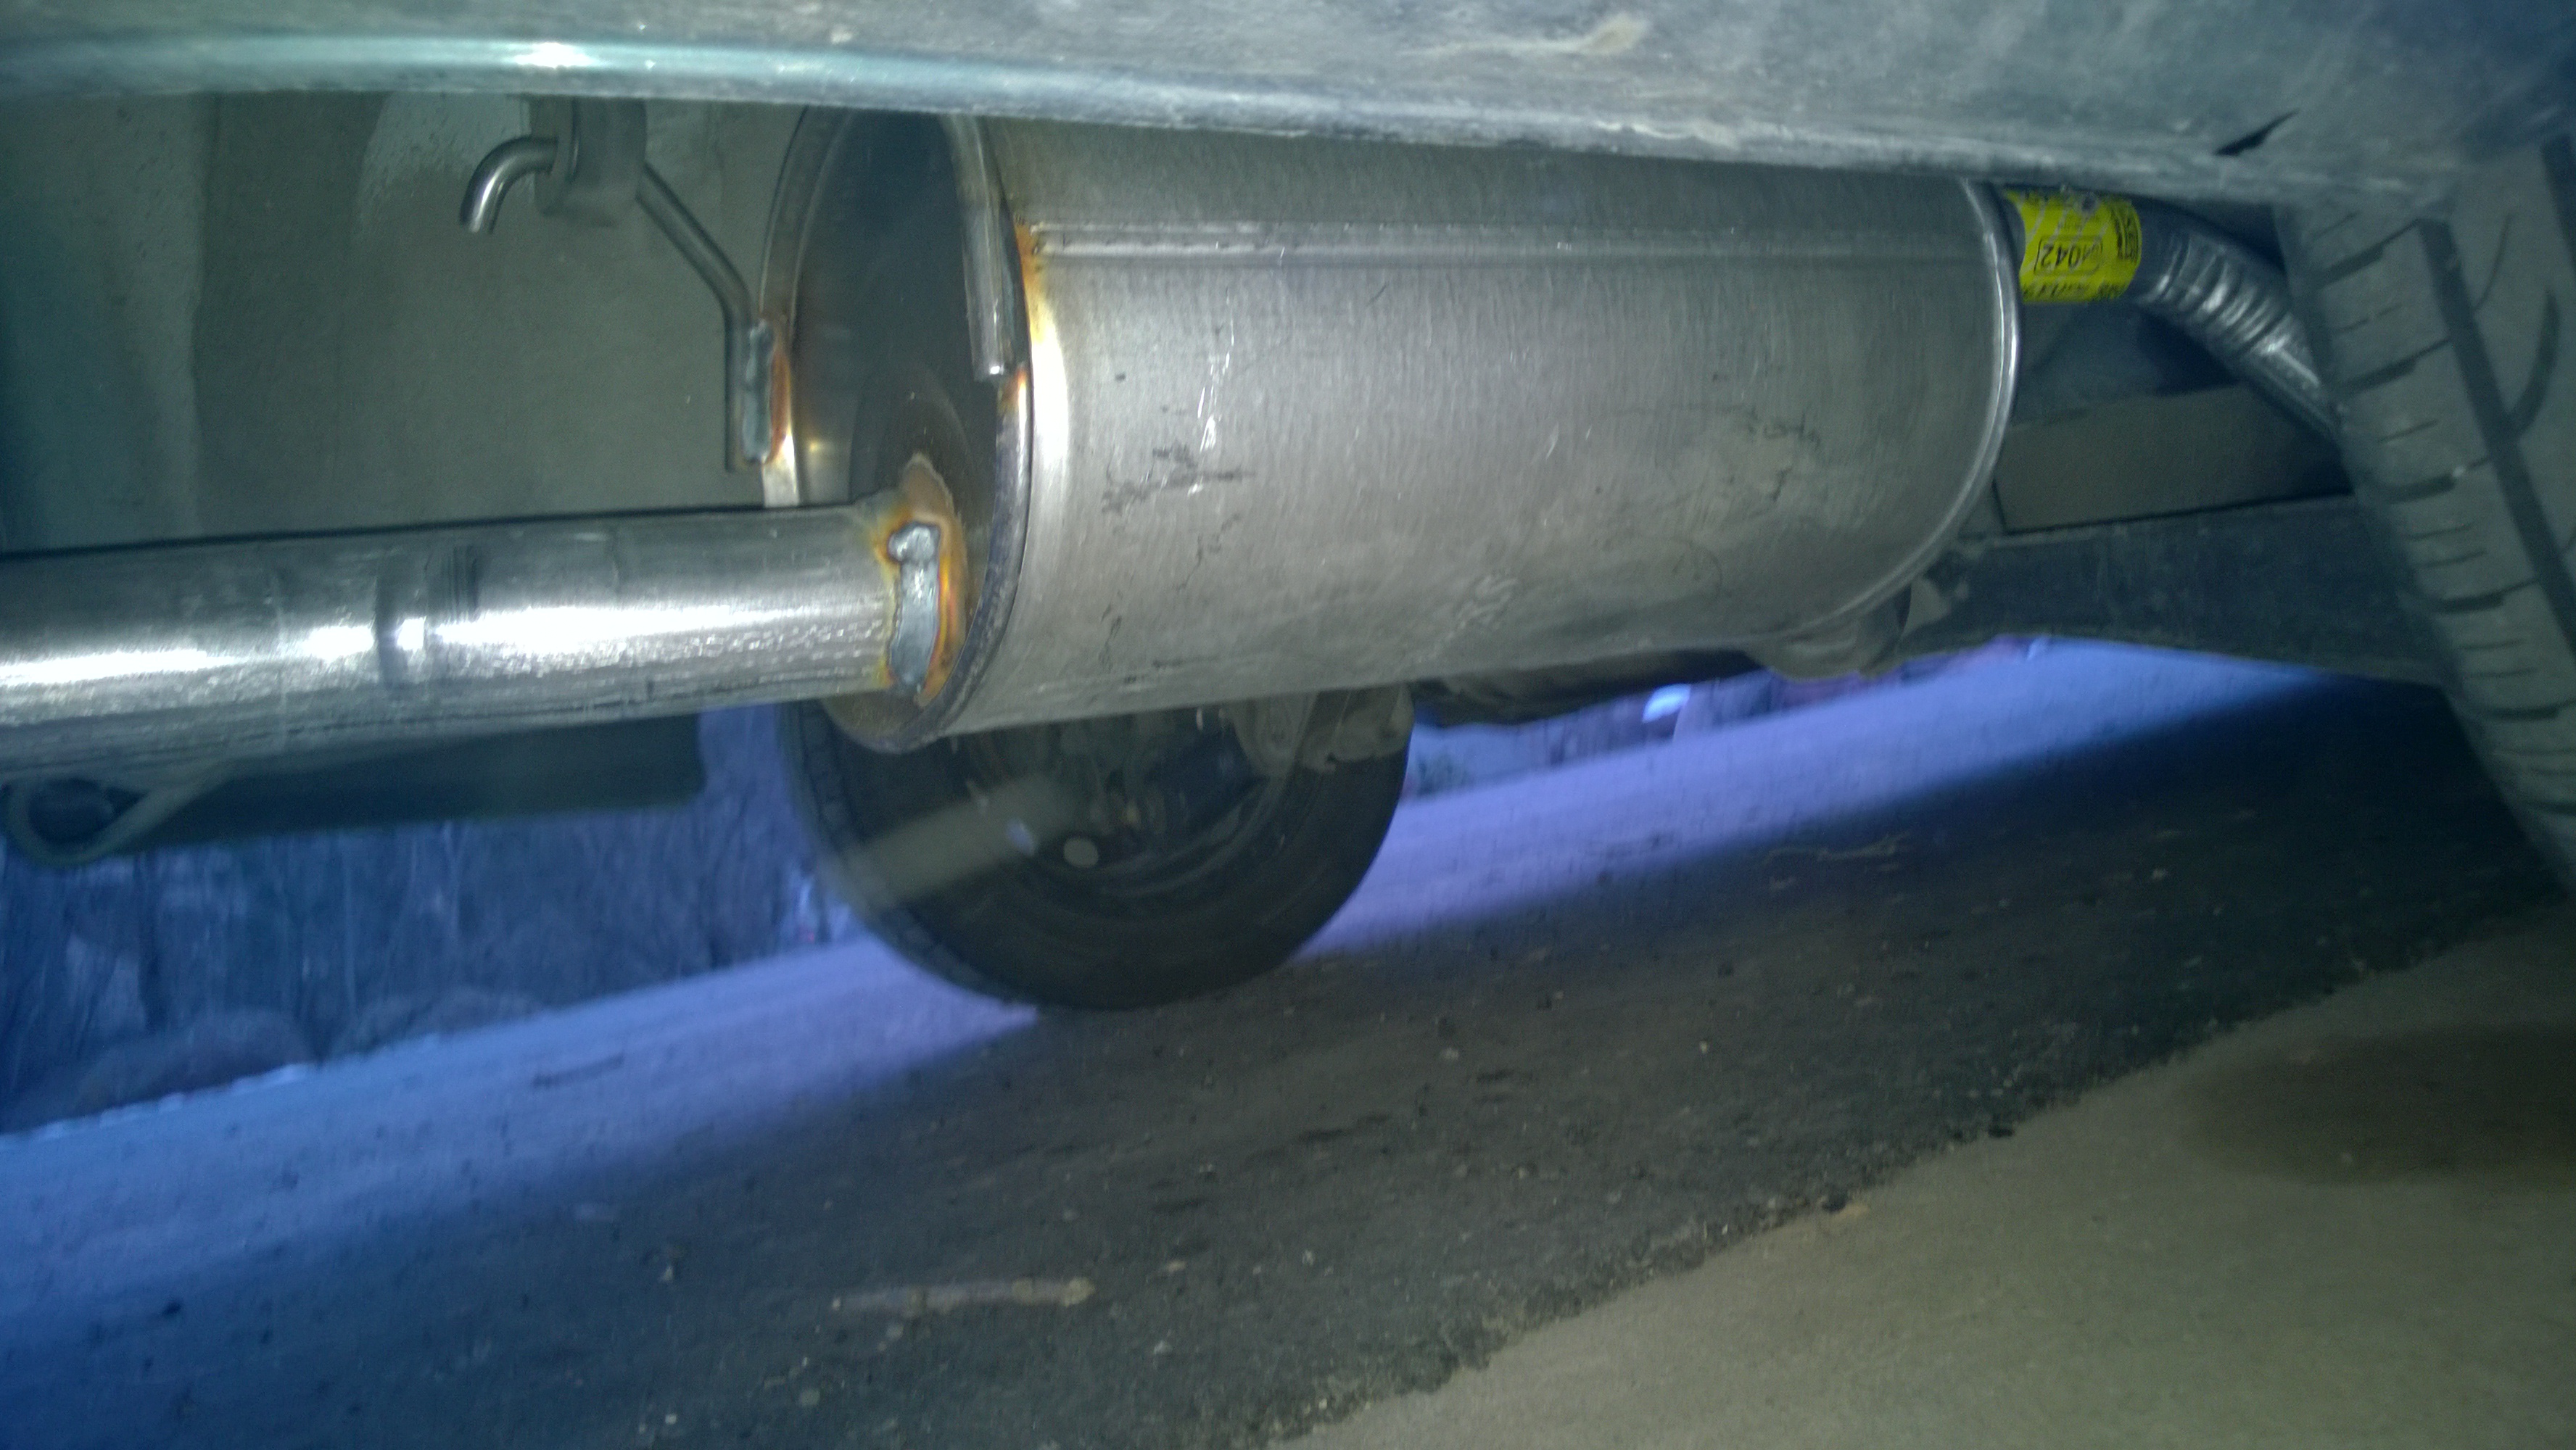
WP_20150314_025

Looks good.

Fixing auto upholstery in a 1998 Honda Civic EX

The mighty civic has been through a lot. Its been backed into three times just on the drivers side. It was hit twice on the passenger side. Still the might civic plods on! 36-42 mpg with its mighty v-tec and 5 speed manual. Yes it is a clown car for me as I am almost 6′ 3″ but it is a blast to drive.

So onto the upholstery. The front driver seat was torn between the side panel and the main seat panel. Well since I have that handy dandy Kingmax industrial sewing machine I might as well put it to use.

First, I gathered materials. Colorado Auto Trim and Supply in Denver has bought the end runs from all the manufacturers. Though this is a 1998 there was none left but being they had hundreds of samples we found a great match.WP_20130703_001

Now I remove the front seat, very easy to do in the civic. I remove the hog rings with a pair of pliers. Now make sure you have a pair of hog ring pliers if you ever work on older car seats , to put them back together or you will be making it a lot harder than it is. I was able to get the seat cover off without taking the seat apart. Note, this would be a great time to put in heated seats had I been thinking ahead. You see that little ring of metal in the middle of the picture.  That is a hog ring.  The pliers wrap that sucker in a circle around the embedded wire in the seat cushion/base.  Without these your seat will not be snug and will look like crap.  Don’t even try channel locks, order a pair of hog ring pliers from amazon if need be.  McGuckin Hardware had them in stock in Boulder.

WP_20130708_003

When it is apart the seat looks like this:

WP_20130708_001

I take the panel apart with a knife which I found to be easier than the seam ripper I tried and broke on the seam.

WP_20130703_009  WP_20130703_006

The seat was pretty worn out as it was the driver seat on 167K mile civic so I also decided to change the side panel as you can see its almost disintegrated on the back side of the panel.  You’ll notice some plastic supports to be sewn back in, this is not problem for the Kingmax but it is for a home machine.

WP_20130703_010

I used the old panels as a template and sewed it up on the Kingmax with 69 bonded nylon. It didn’t take that long. A few seams, making sure to sew over the junctions and get it all back looking like a cover.

WP_20130708_005

Time to stretch the cover back over the seat and re- hog ring it.  Then I installed the seat back in the car. Still working great to this day. Notice that fine toolset in the photo, on loan from Kristen.


Next up as we are doing well so why stop with the seat!  Onto the armrest.  It is toast, worn to the threads.

WP_20130715_005

This is easy, no sewing machine involved.  Just 3M spray adhesive  77 and some fabric.  First we remove the covering.

WP_20130715_006

That was quick, pulled right off.

Spray the fabric and spray the armrest, let dry. I use a mask and do this outside, I also use safety goggles no need to have a errant spray in the eyes.  Gloves are good as well as this stuff doesn’t like to come off.

Wrap that fabric slowly as this is contact cement and it holds well.  So work it from the middle out and we get the final product.


WP_20130715_004

Screw back the various hinges and hardware and we are done.

WP_20130715_009

This was early July 2013.